Hoot, hoot hooray. What a fab day!

Last weekend I spent a morning with Sam of Stitched Up By Samantha.  Sam makes wonderful fabric art using free motion embroidery.  I’ve admired her stunning pictures since forever, but this time I got to find out how she does it and to have a go myself with some other like-minded ladies.

I’ve tried free motion embroidery at home before but never had much success.  It is so much better to have an expert on hand to help solve any tricky problems.  Sam is a very patient teacher and first took us through the process of setting up our sewing machines for free motion embroidery.  

If you’ve been sewing for a while, then the hardest part is probably getting to grips with the idea that you can draw, (yes, draw!) with your machine.  It didn’t take long before we were all happily scribbling away on scraps of fabric. 


Then it was on to creating our own mini work of art.  I chose to make a cute little owl and this is how he turned out.  Not bad for a first attempt.

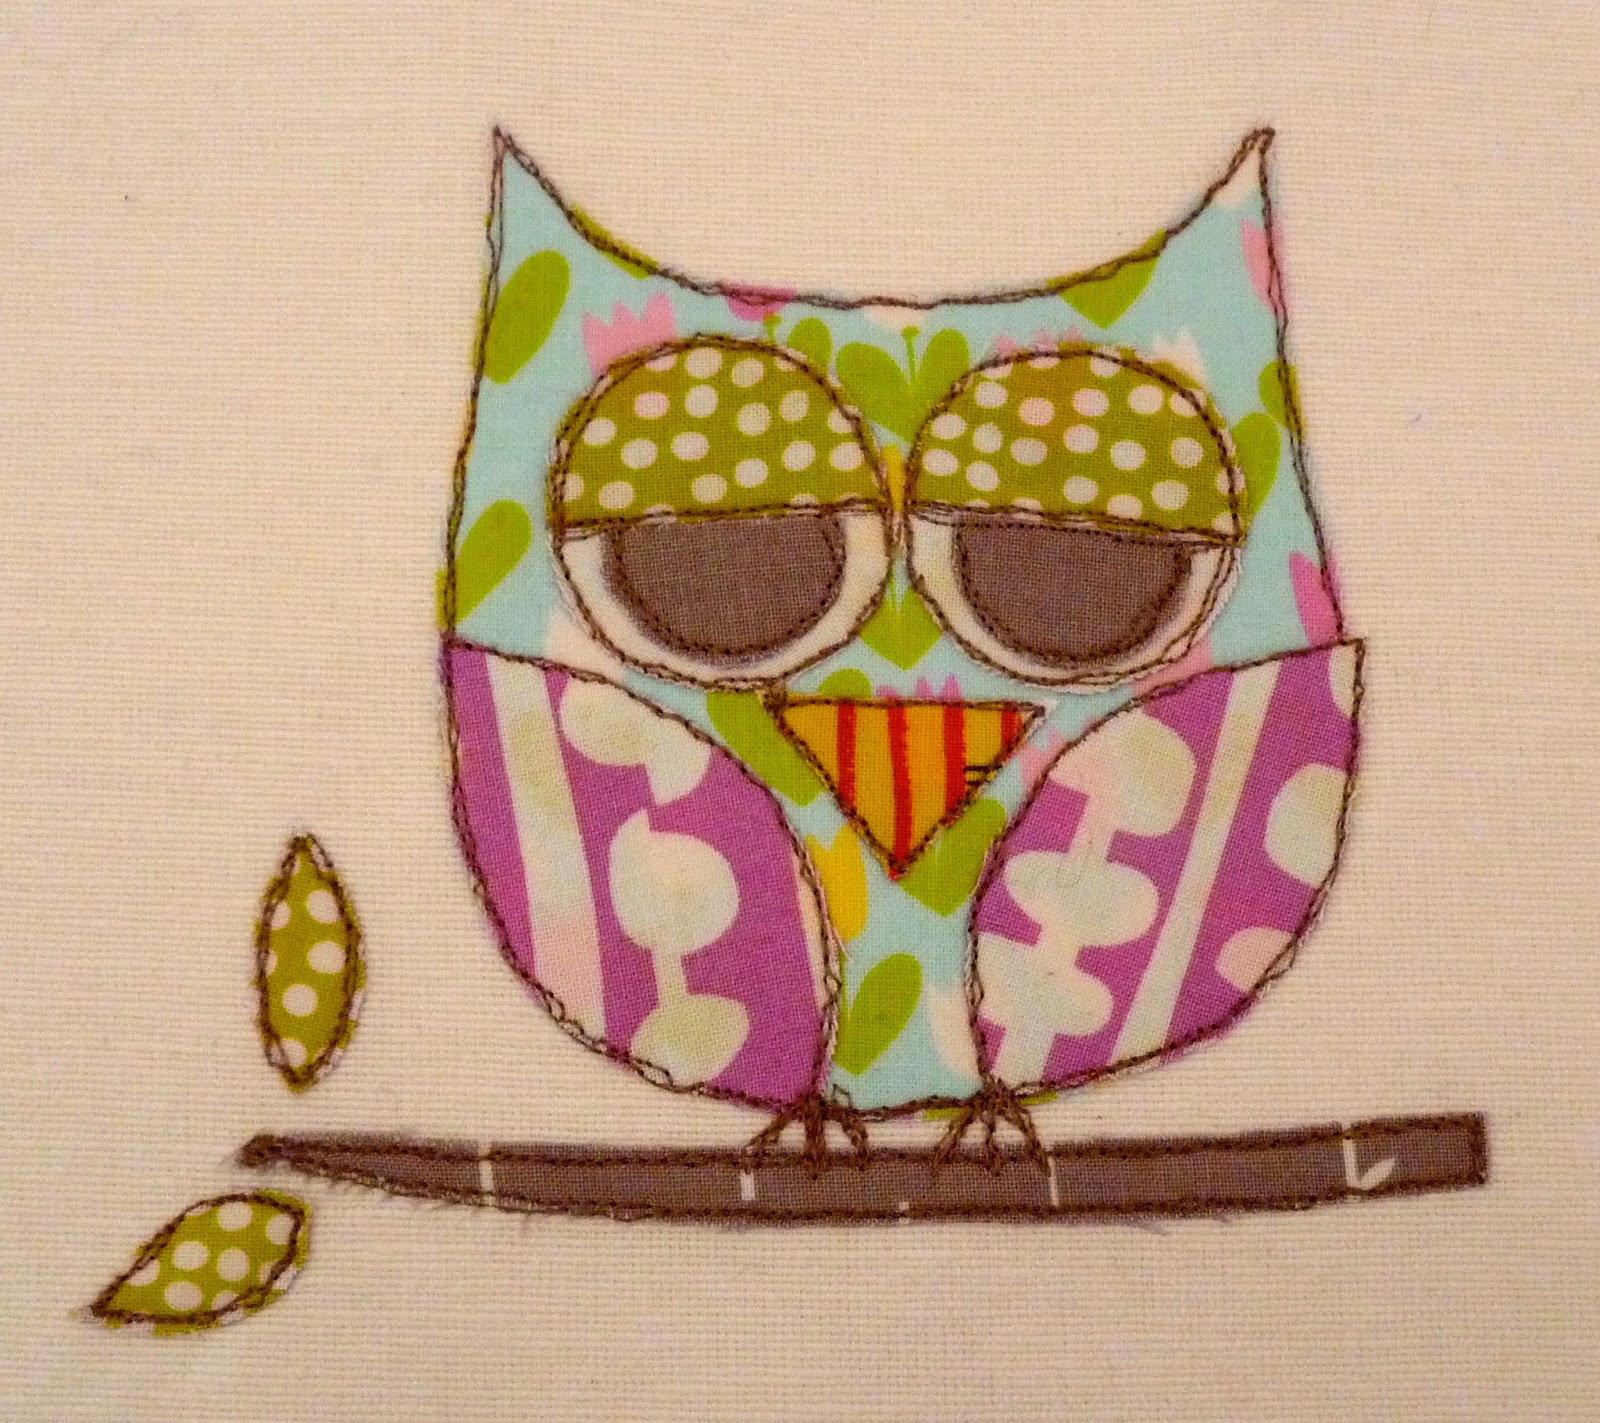
Now I just need to find a frame for my sleepy little fellow. 

I loved doing free motion embroidery.  It is such a lot of fun.  If you would like to try it yourself, Sam holds regular classes at Fabric HQ.  

Love at first bite

Red velvet cake is such a pretty cake.  The gorgeous crimson red colour is a lovely choice for many occasions – Christmas, ruby wedding celebrations, halloween and, of course, Valentine’s day.


Cream cheese frosting and a sprinkle of red cake crumbs is the traditional topping for red velvet cakes.  I’m not really a fan of cream cheese, so I piped roses in vanilla buttercream instead.   Much prettier and just as delicious.


These ones were the just desserts of the ladies at the Sewcial on Tuesday at Fabric HQ.  

Such a delightful way to end a great evening.

My new favourite gadget

I  popped this inexpensive little gadget into my shopping basket on a whim and it is just the best thing.

The corner trimmer was designed to simplify sewing right angled triangles, such as half square triangles or flying geese blocks.  The main reason I wanted to give it a try was because it also makes it easier to cut and sew the bias edges when piecing binding strips (one of my bugbears).    

Anyway, to use this little gadget for binding, I cut my strips and then simply lined up a straight edge of the trimmer exactly on the long edge of a binding strip.  I first cut the diagonal edge and then the 90 degree triangle.  Turning the strip around, I did the same at the other end.  

Cutting off the little triangle on the end made such a difference!  No more guesswork matching seams. Now they lined up perfectly.  


And there were no “dog ears” of fabric to cut off after the seams were pressed open.


When sewing the binding to the quilt, I prefer to use a diagonal seam for the final join.  The corner trimmer made this so simple to do.  It was small enough to manoeuvre on the binding strip ends and the clear cutting instructions made it easy to get the final length of the strip just right.

I love this corner trimmer and can see that I will be using it often.  Binding from now on will be a breeze!  

A Christmas quilt

My sister-in-law has been going through some difficult times of late.  Not eating properly and little sleep doesn’t help either.  For the times you can’t be there in person, a quilt shows you care by providing comfort and warmth.  When wrapped in a handmade quilt you really are surrounded by love and Christmas is the perfect time to give a gift of love.  

My sister-in-law loves autumnal colours and this Honeysweet collection by Fig Tree and Co contained all the colours she loves best.  The reds and greens also look suitably Christmassy.  

The pattern is from Jelly Roll Quilts by Pam and Nicky Lintott.  It is an easy design to put together and I love the way the blocks create an optical illusion, appearing to float in the background fabric.  

A cherry fabric from the Eden collection by Nel Whatmore was used for the backing and a stylised flower design was chosen for the long arm quilting.  

The binding fabric is from the Honeysweet collection.  I couldn’t source this one in the UK and ended up ordering it from the USA.  I’m glad that I made the effort to find it as it tones perfectly with the Cherries fabric.  Being a perfectionist has its benefits.

My sister-in-law loved her quilt.  All of it.  She loved the colours and the design.  She loved the soft feel of it.  She loved the cosiness and warmth.  As soon as she pulled the quilt out of its wrapping, she curled up in the armchair, pulled the quilt over her and fell asleep for an hour.  The healing has begun.

Let it snow

When you need to make a batch of cupcakes in a hurry, then snowflake decorations are a lovely option.  These were a last minute request for a work event.


Delicious chocolate cupcakes smothered in yummy chocolate ganache.  The fondant snowflakes were brushed with lustre dust to give them a bit of wintery, Christmassy sparkle.    

Chocolate ganache is the perfect topping for those who don’t like their cake indulgence to be too sweet.  I always make a little more ganache than I need.  It saves any last minute panic plus the leftovers taste fabulous on warm toast and make a great mocha when added to a mug of coffee.

Burnt butter biscuits

Burnt butter biscuits.  Sounds as though something went terribly wrong in the kitchen, doesn’t it?  Not so.  These are lovely, buttery biscuits just perfect with a cup of coffee and a good book on rainy afternoons.  

The recipe was given to me by my sister and I have been intending to make these biscuits for a while.   Looks like today is the day.  My niece (of the red quilt) made a batch for their local agricultural show.  I’m very pleased and proud to say that she won a prize.  Not sure which one, however these biscuits are so delicious, I’m sure it must have been first prize.


Here is the recipe – in old money but pretty easy to convert the amounts to metric if you prefer.

Burnt butter biscuits – makes at least 2 dozen
1/4 pound butter
1/4 pound sugar
1 egg (I used a medium egg)
5 ounces of self raising flour
Melt the butter in a saucepan until it turns nut brown in colour.  Don’t let it get too dark or it will taste bitter.  That would not be good.
Cool slightly (you want it to be cool enough that you can touch the sides of the pan) and then beat in the sugar.   
Add the egg,  mix well and then add the flour.
Stir until combined.

Roll into balls about the size of a walnut and flatten them slightly on the baking tray.  Leave some room between them as they spread when baking.
Pop half a glace cherry (my favourite!) or piece of blanched almond on top of each biscuit.
Bake in a moderate oven (180C or 160C for fan ovens) for 10-12 minutes or until light golden brown.   
Allow to cool on a wire rack and store in a tin.
Don’t have a tin?  Not a problem.  These biscuits will be gone long before you need worry about a tin! 

Enjoy!

The making of a quilt

A handmade quilt is such a personal thing.  This is the story behind the making of this one. 

It started with the backing fabric, a gorgeous fabric by Cosmo Cricket from their Odds and Ends collection.  I loved it and I knew my niece, who is a big fan of inspirational quotes, would love it too. 

During a recent visit, I took my niece into the local quilting shop and asked her to choose five fabrics for her quilt.  As she lives in Australia and I live in England I don’t get to see her nearly as often as I would like.  Our trip to the quilt shop was therefore a great opportunity to spend time together and for me to get to know more of her likes and dislikes.  

So, I learnt that red is her favourite colour, that she doesn’t like overly flowery fabrics and prefers more quirky designs.   After much deliberation, these are the fabrics she chose and I think they look great. 

Fabrics (left to right): Perch by Timeless Treasures, Rural jardin by French General (Moda), Lost and found red stripe by Riley Blake, Folk tale birdcage by Riley Blake, Velo fleurs by Timeless Treasures.

A few days later I went back to the shop without my niece and, with the help of Merrilyn from Threadneedle Craft, chose a further four fabrics.  This is the final fabric selection, just right for a young teenage girl.
Fabrics (top row left to right): Lost and found red dot by Riley Blake, Perch by Timeless Treasures, Red stripe by Sweetwater (Moda) (middle row left to right): Rural jardin by French General (Moda), Lost and found red stripe by Riley Blake, Folk tale birdcage by Riley Blake and (Bottom row left to right): Daisy (maker not known), Velo fleurs by Timeless Treasures, Folk tale fairy by Riley Blake.

Back home and it was time to get cutting.  For the quilt top, I used a random arrangement of strips eight inches wide, varying in depth between two and four inches.  I first laid out the strips to check that I was happy with the flow of the colours and designs before sewing, rather than relying on chance that the strips would work well when sewn together haphazardly.
The final step, basting and quilting, was expertly done by a local long-arm quilter.  I chose an overall quilting pattern featuring stars as it reflects my niece’s name.

My niece now has a quilt that she loves and uses every day.  She sleeps with it at night, snuggles into it when watching tv and uses the quotes to inspire and encourage her.  Her quilt is soft and warm and lovely.  And it is a true reflection of her.  She can use it throughout her life and have something beautiful to pass on to future generations.  And what could be better than that?

Spook-tacluar Sewcial at Fabric HQ

The nights are drawing in and soon it will be time for ghosts and ghouls to roam amongst us during Halloween.  These mummies got a head start, making an appearance at the Sewcial tonight.


And they weren’t the only ones.  There were monsters too, 
 
 
as well as giant spiders, scaredy cats, ghosts and even a haunted house!
 
 
Those brave souls undaunted by these fearsome creatures found a ghoul-licious chocolate cake and dark chocolate buttercream hiding underneath.  Turns out most people found these monsters rather sweet and not frightening at all!

Everything’s coming up roses

Congratulations to Fabric HQ who celebrated their third birthday last week.  To wish them happy birthday, I made this lovely bouquet of flowers for the Sewcial last night.
To make the bouquet, roses – in white or graduated pink tones of buttercream – were piped on vanilla cupcakes using a 2D nozzle.  The roses were then attached to a foam ball (not as easy as it might look! but fortunately I had a fantastic teacher – the lovely Natalie from Faircake, London), creating a pretty ombre effect to the arrangement. 

Beautiful to look at, the roses have a gorgeous vanilla scent and are delicious to eat.  I think a cupcake bouquet makes the perfect birthday present.  Happy birthday Fabric HQ and wishing you many more.

Scrappy jelly roll quilt

How pretty is this fabric collection by Moda?  Called Fleurologie, it is a beautiful mix of aquas, greens, pinks and yellows with just a splash of a dark, bright blue to liven it up.  

I have been having a real thing with jelly rolls recently.  Not satisfied with one jelly roll, I used two of them to make this scrappy style quilt.  

The backing is a bird lover’s delight incorporating images of small British birds.  A small stylised leaf was used for the long arm quilting; with cream thread used on the front and olive brown on the reverse.   


And for the finishing touch, I used my favourite squared elements fabric in yellow for the binding.  

At 173cm by 175cm this quilt is a very versatile size.  It would look fabulous on a sofa or bed and is the perfect partner for snuggling up with a good book or when watching tv.