A country cottage style quilt

Fabric designs featuring large roses and pretty, soft colours make the perfect choice for a country cottage style quilt.  This is a quilt I made some time ago using Tanya Whelan’s Petal collection (sadly no longer available).

Shabby chic/country cottage style quilt

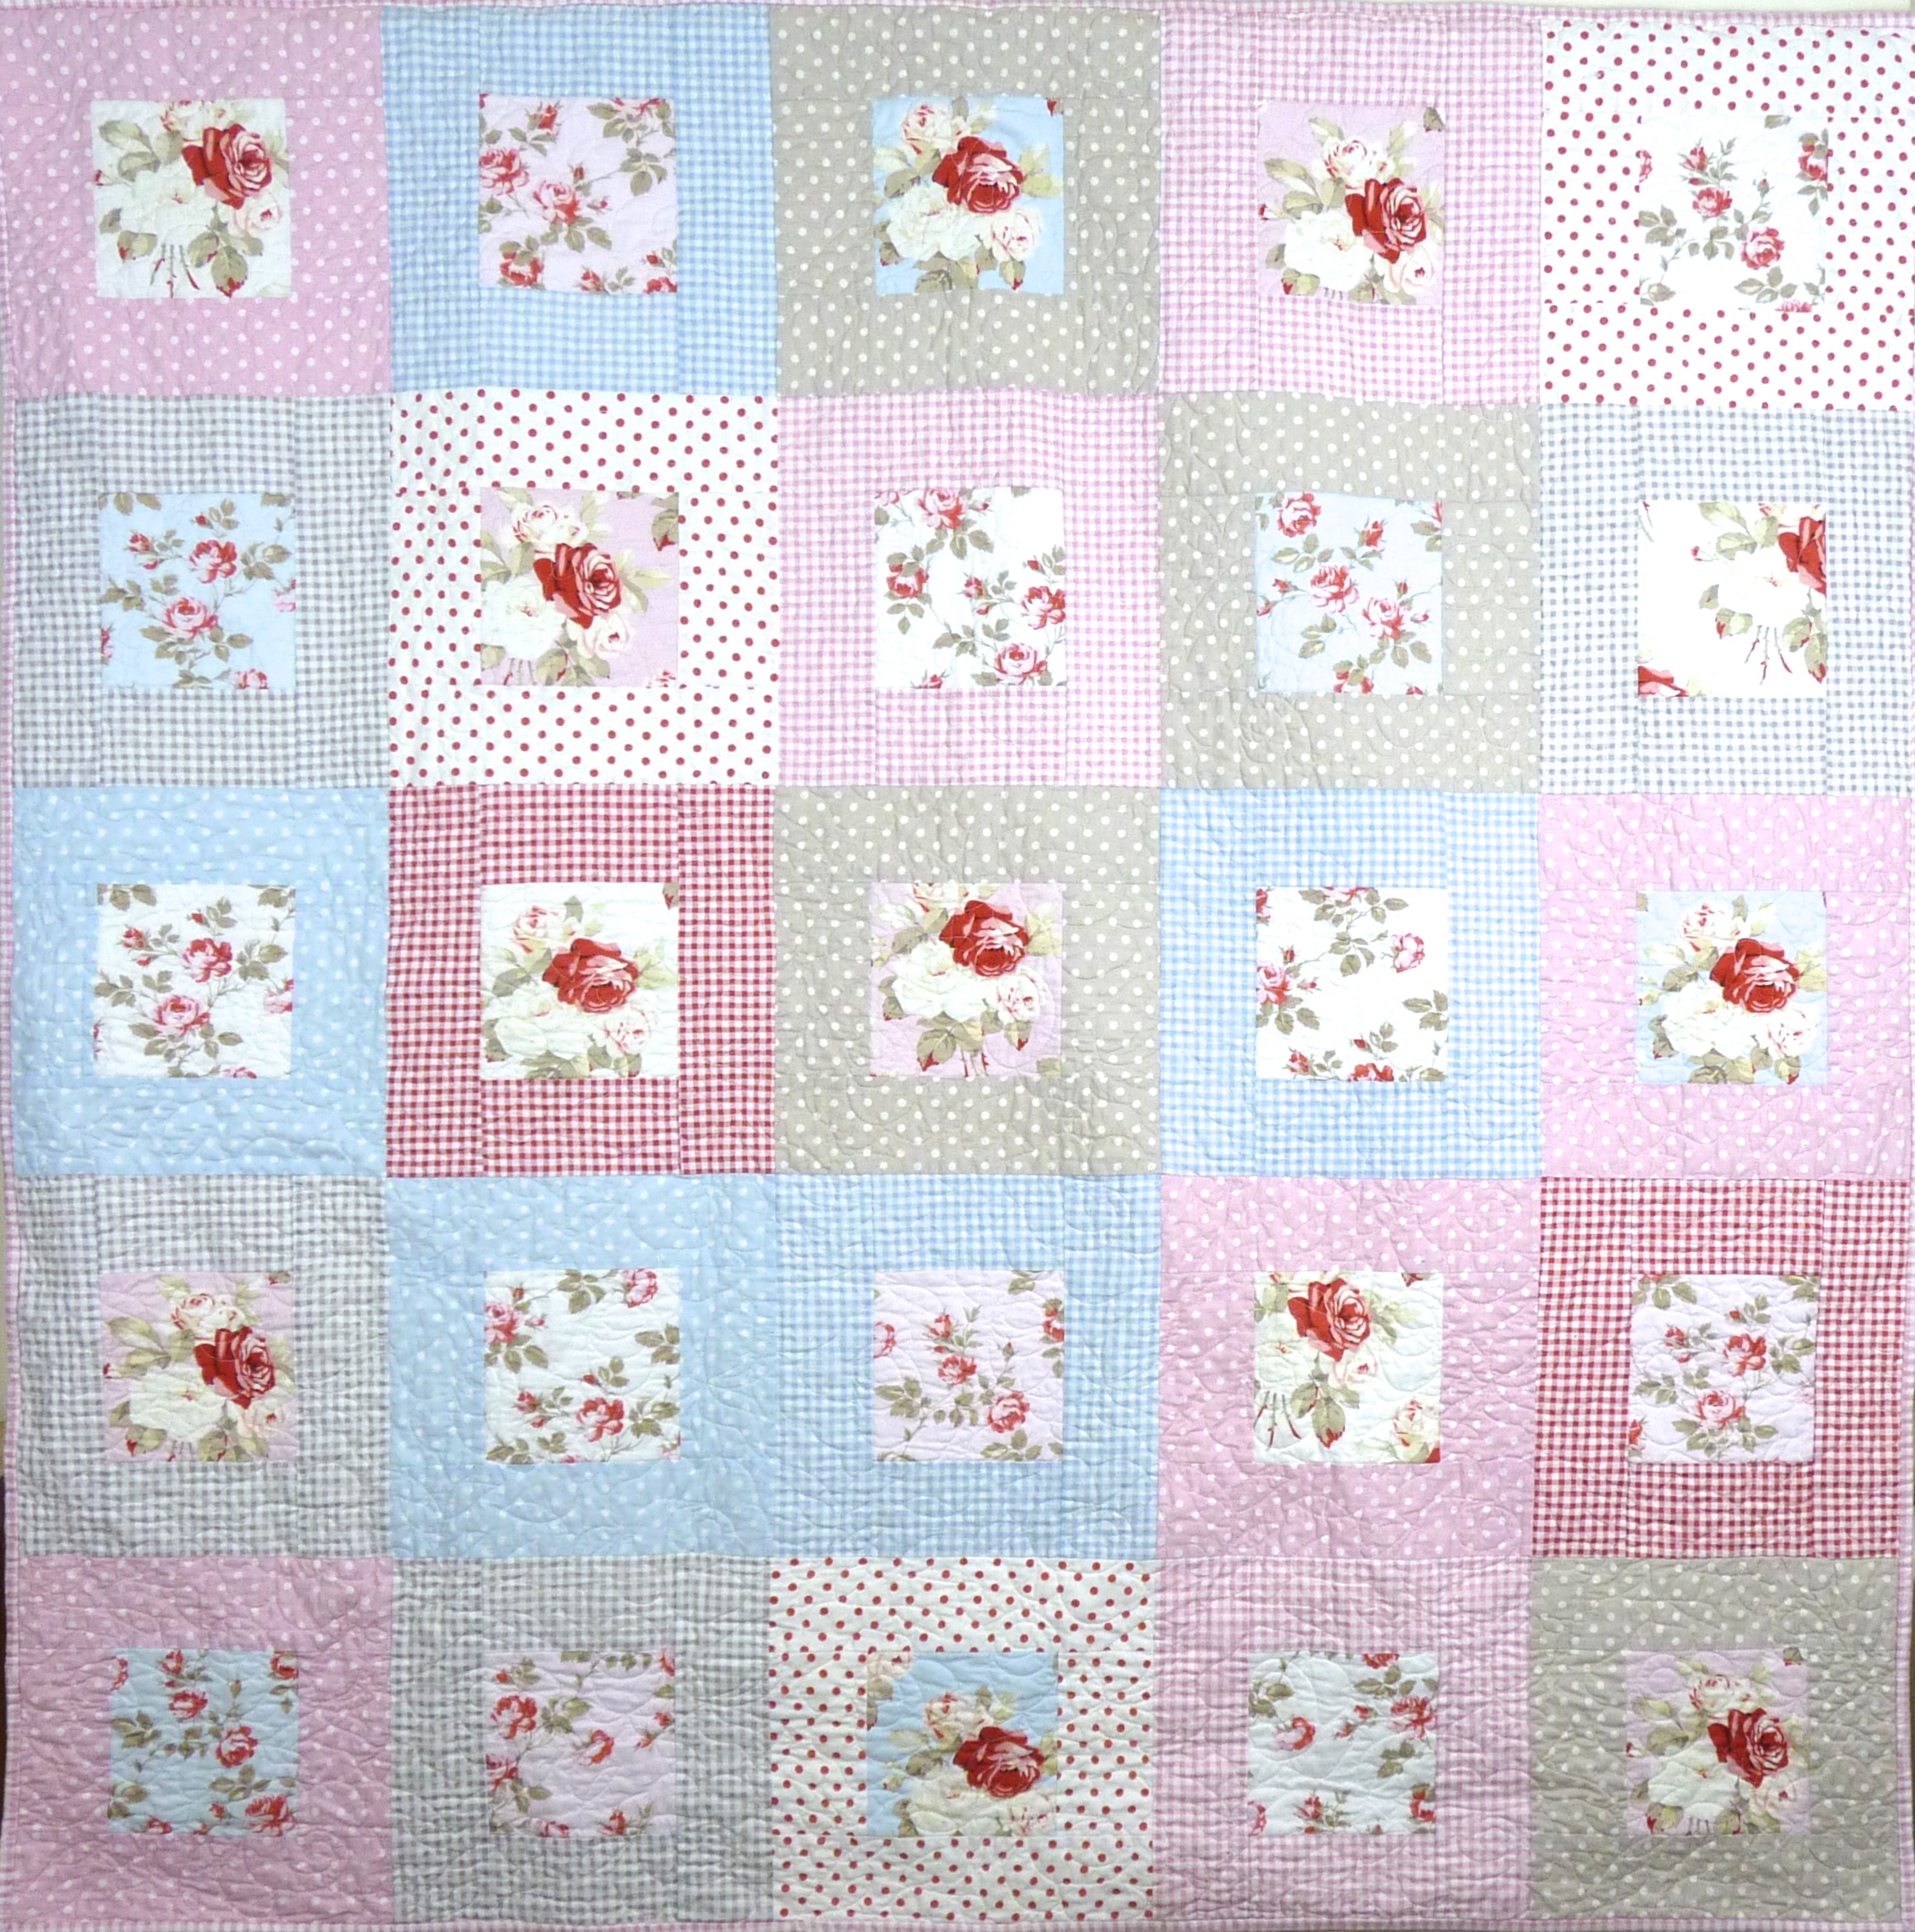
Quilt made in Tanya Whelan Petal fabric

The colours appear sun bleached and summery whilst the overblown roses are reminiscent of warm afternoons relaxing in a country garden.

For the piecing, I chose an upscale version of a pattern appropriately named “square in a box”.  There are lots of variations of this pattern however I kept it simple with a large centre square framed in either a spotted or checked fabric.  The layout I chose alternates between blocks framed in spotted or gingham fabrics.  Initially I alternated the two rose designs too however I quickly changed that to a random placement of the centre roses.  Symmetrical layouts really are not for me.

Roses quilting on shabby chic/country cottage style quilt

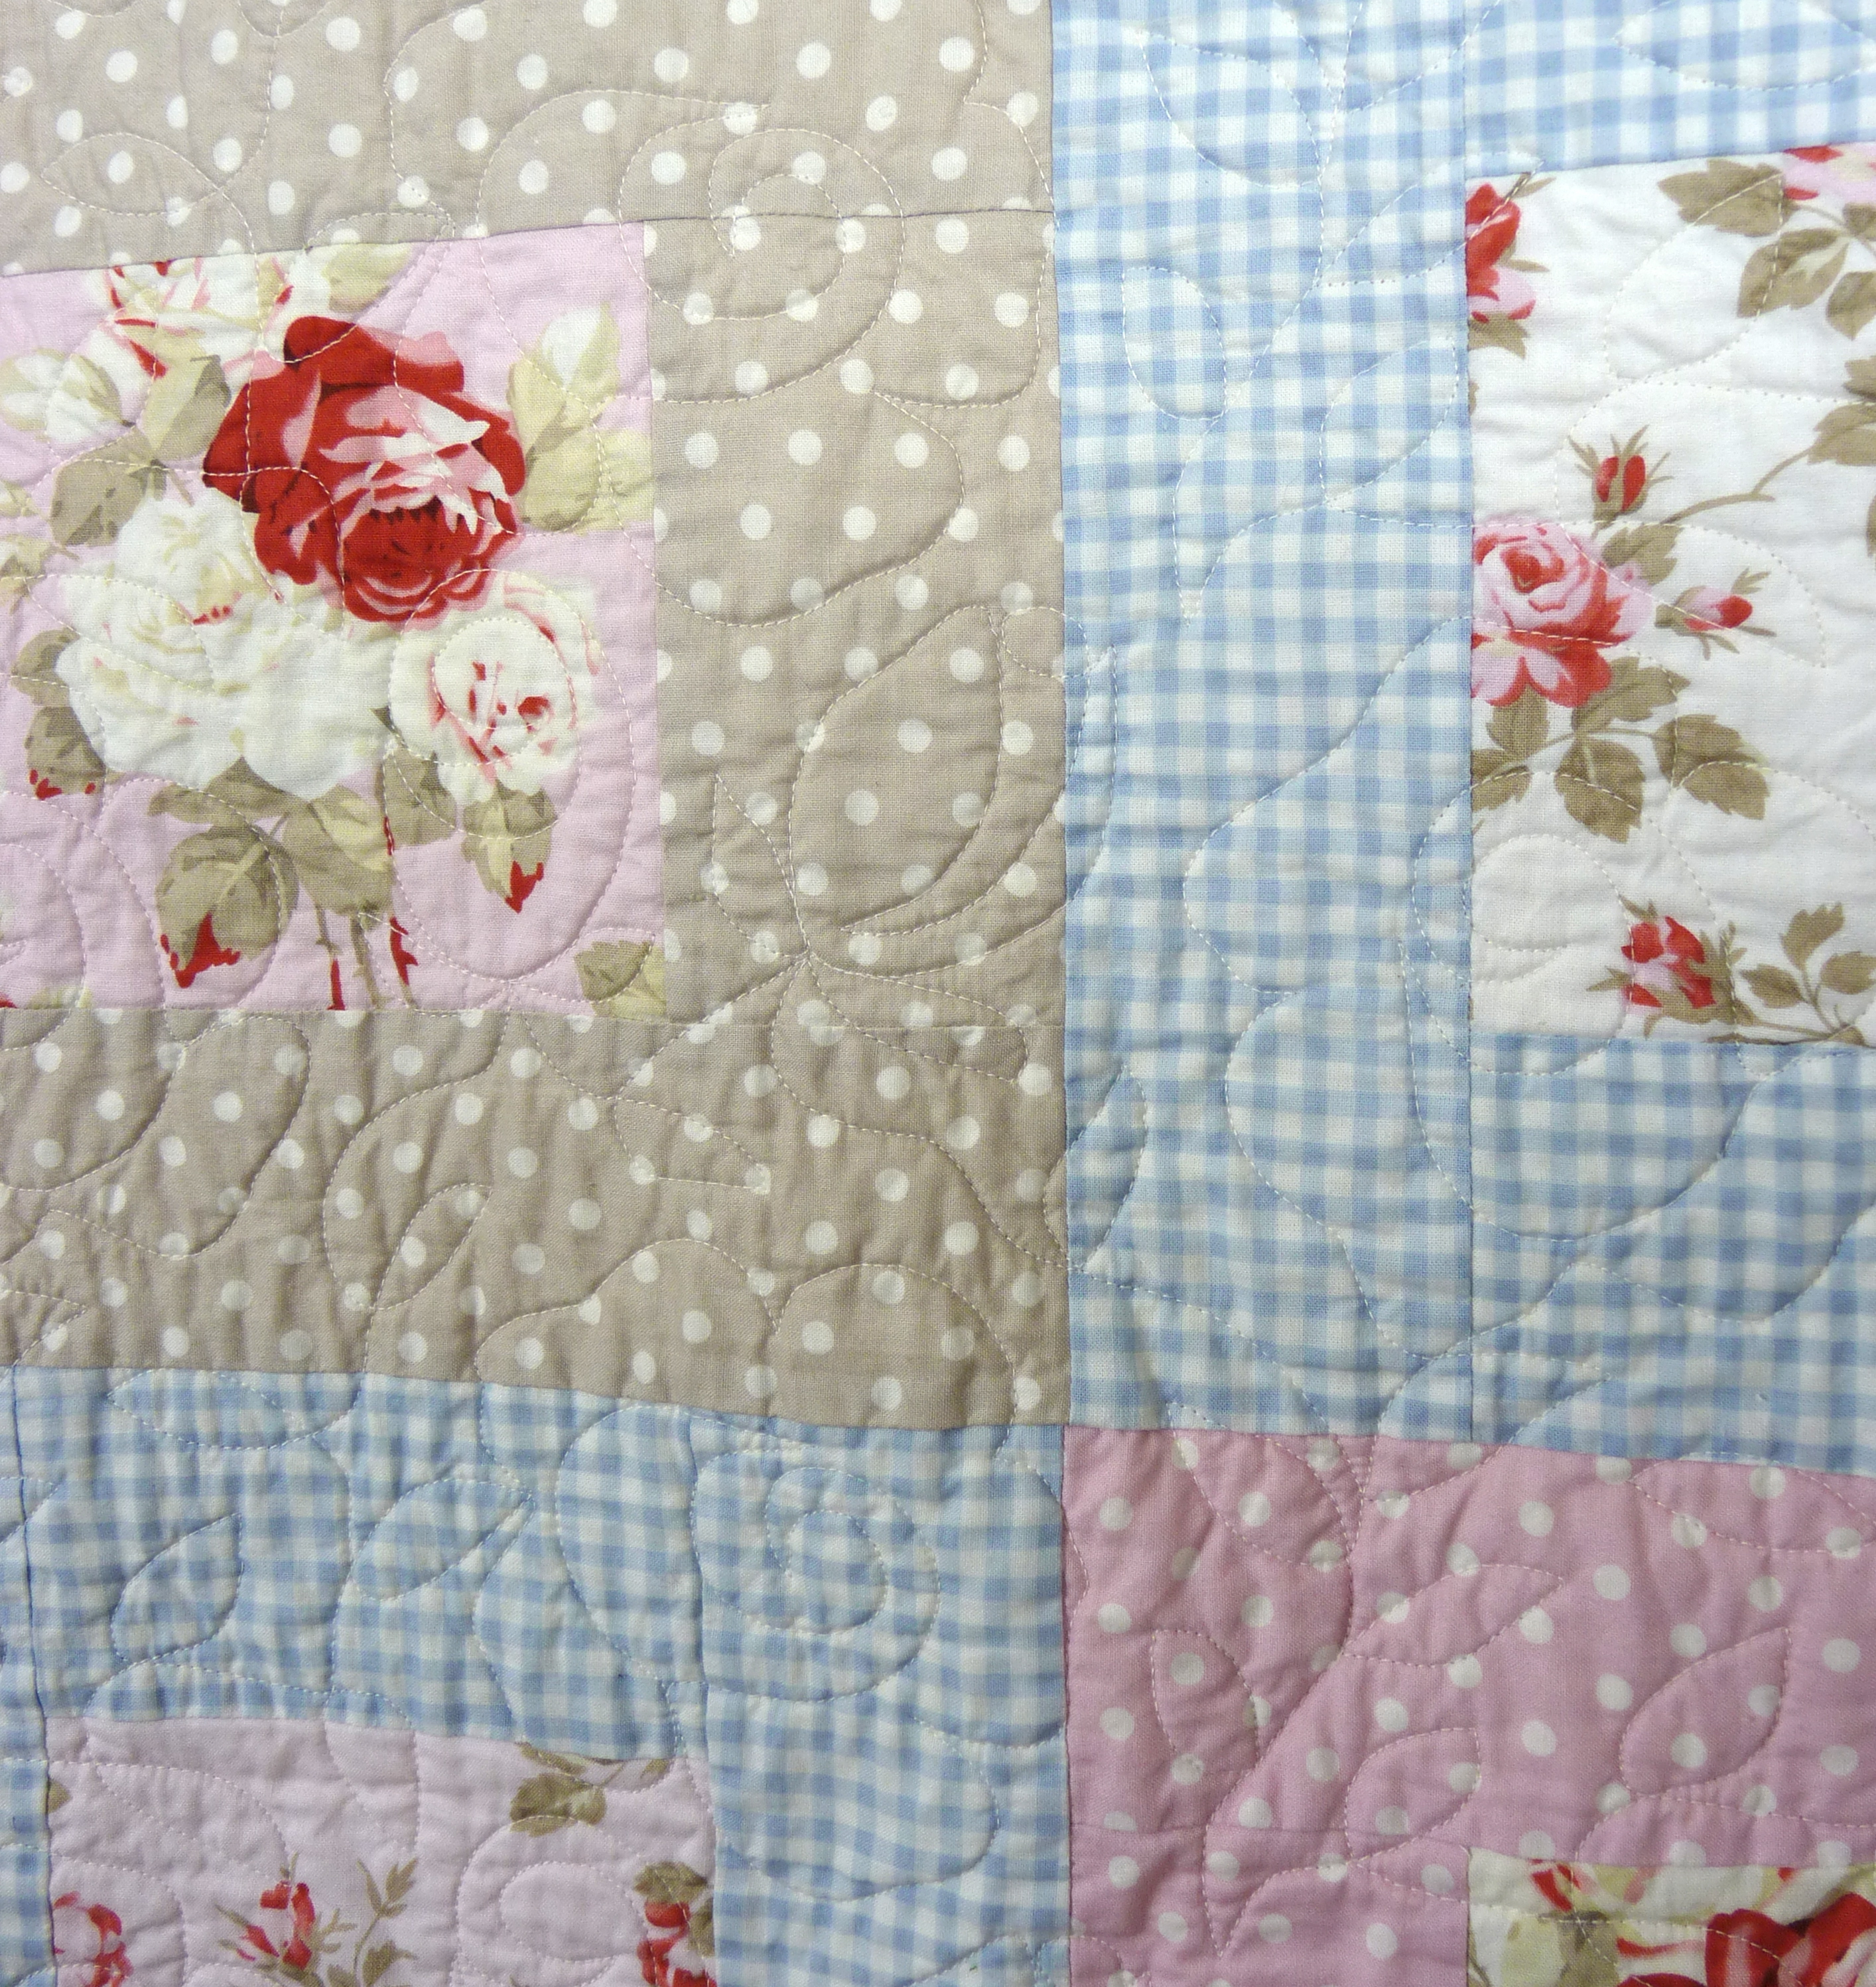
Roses quilting detail on Tanya Whelan petal quilt

The quilt was long arm quilted using a dense pattern of open roses.  It is a little difficult to see in this photo however I think you can make out one of the roses in the gingham square.

Pieced backing on shabby chic/country cottage style quilt

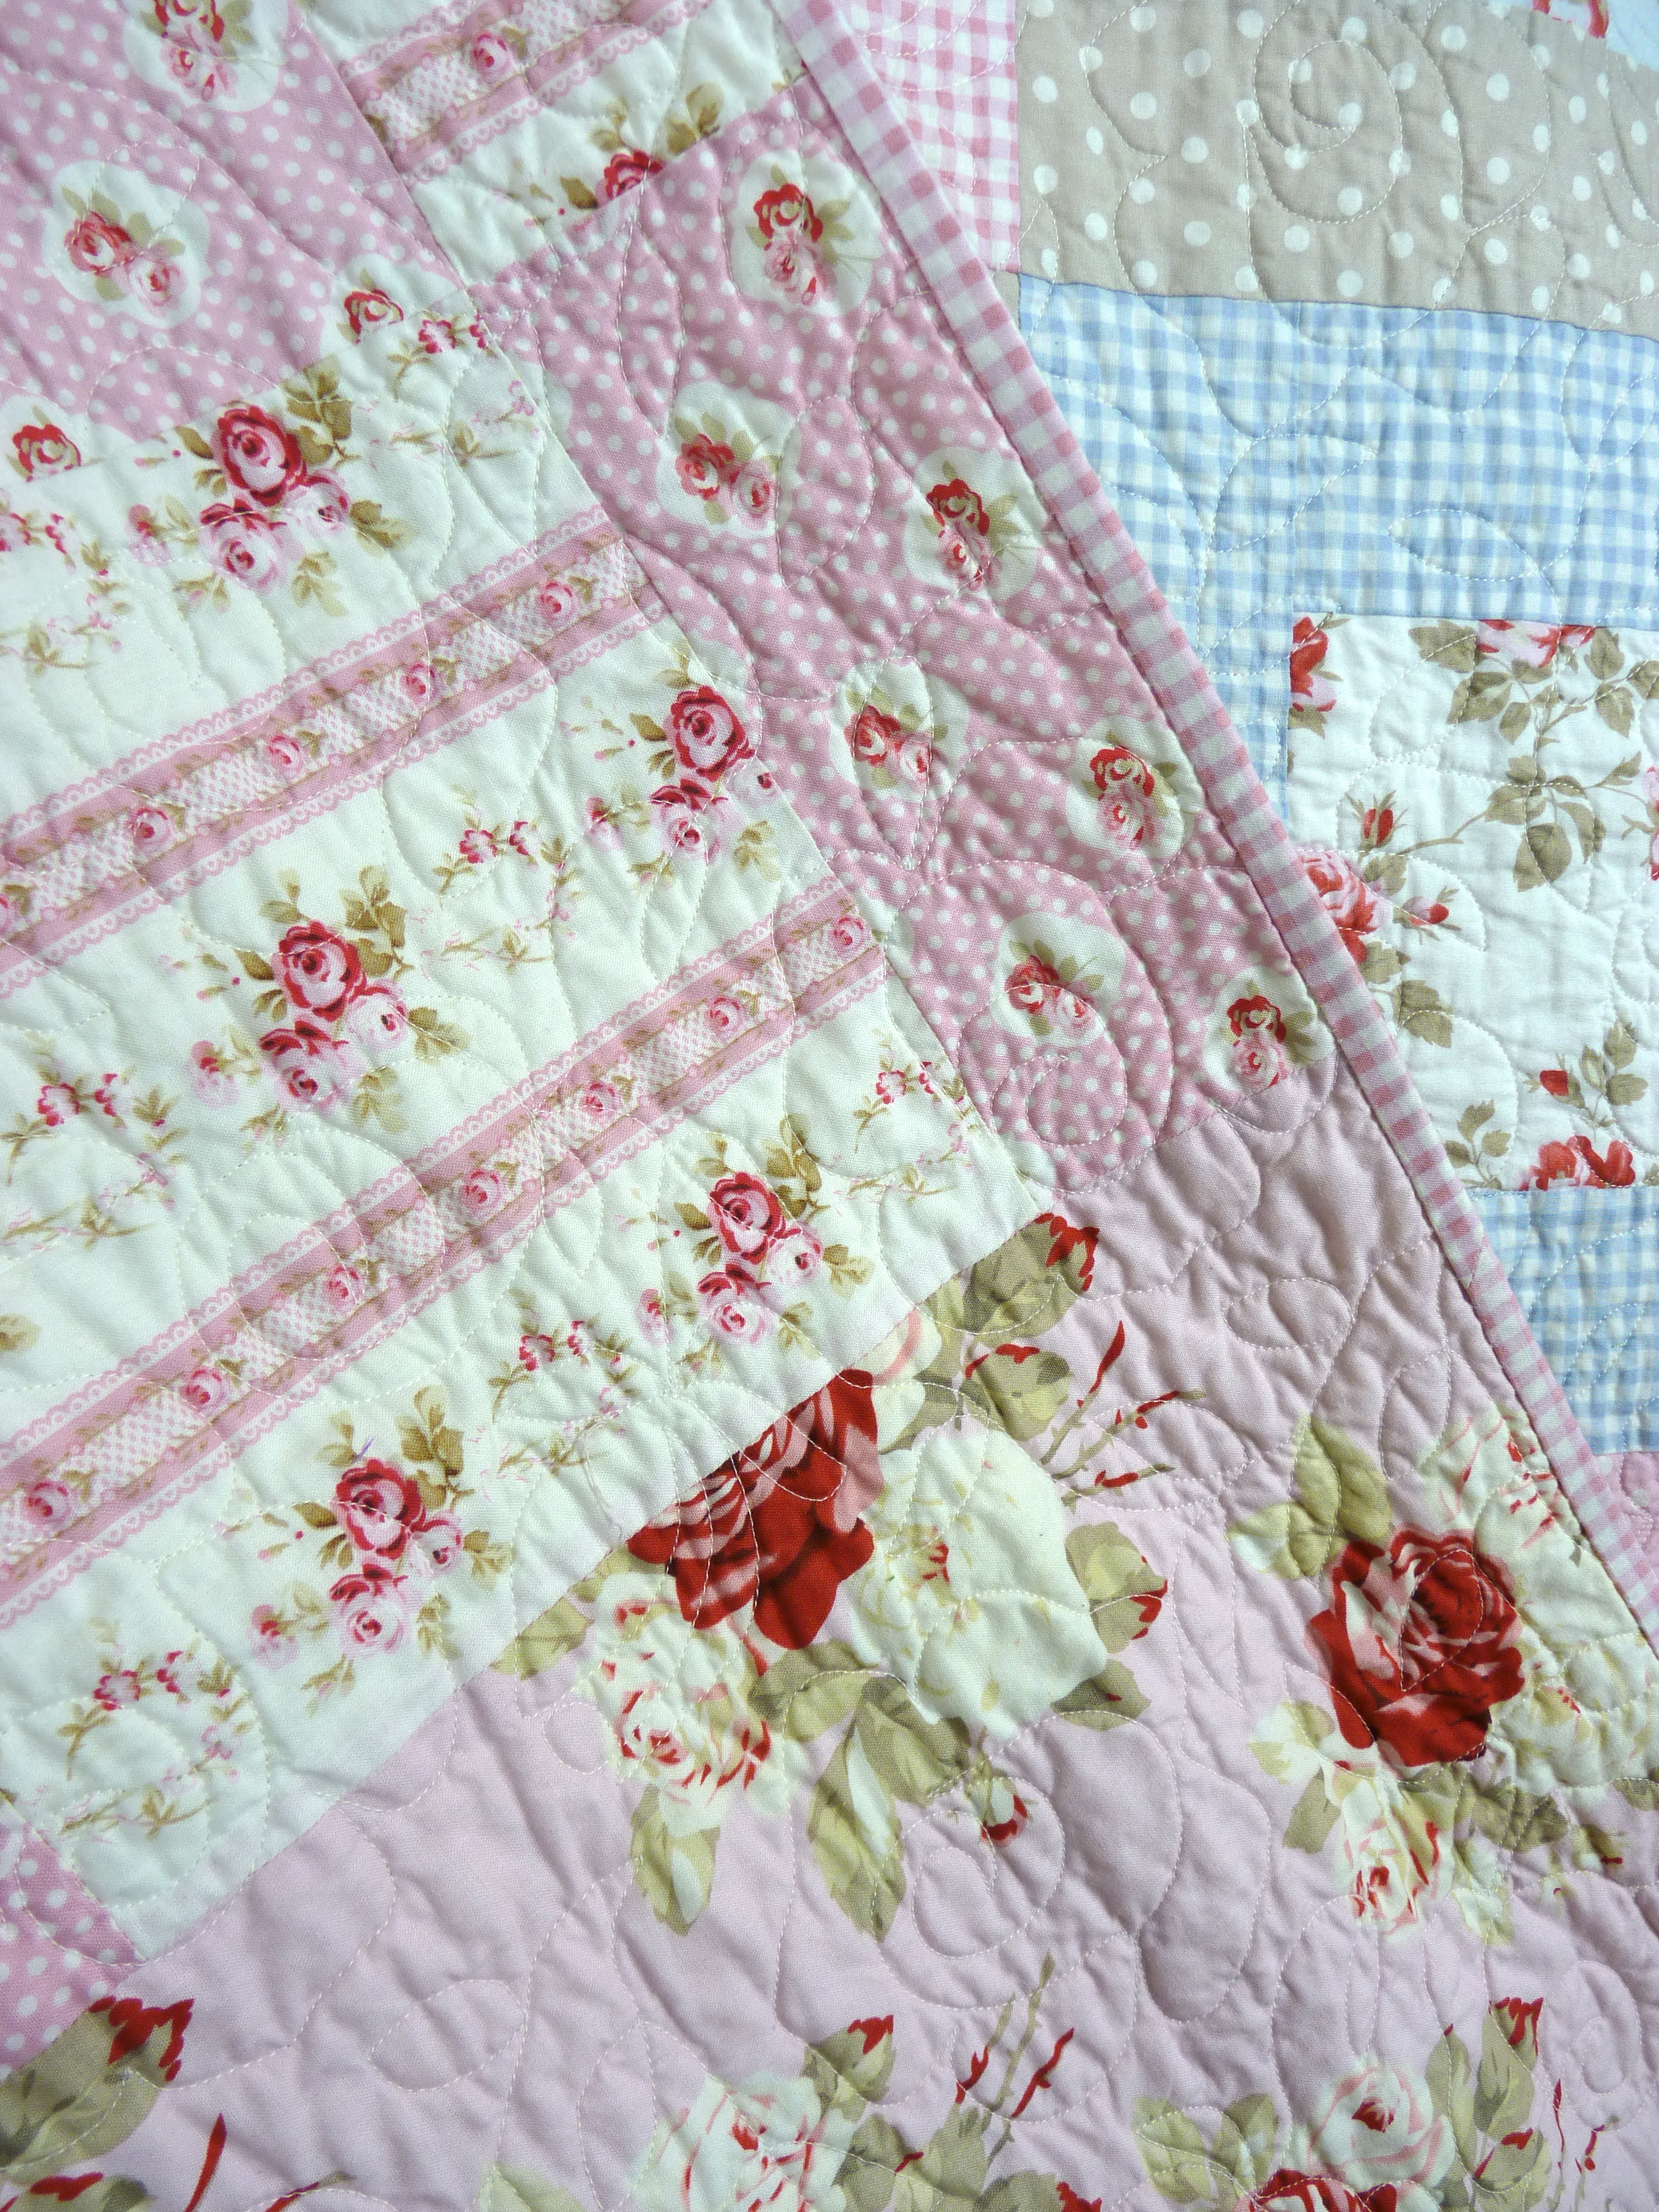
Pieced backing on Tanya Whelan petal quilt

In keeping with the country style of the fabrics, I made a pieced backing for this quilt featuring the large roses and two smaller rose designs not used on the front.  The pink gingham fabric makes a charming binding to finish.

This quilt has been washed to achieve that lovely vintage crinkly appearance and is made from 100% cotton fabrics, thread and wadding.  It will be on display at my Bucks Open Studio event in June.  I’d love to see you if you are able to visit.

Over the next few weeks I’ll be sharing details of more of my quilts that will be on display in June.  Remember you can also follow me on Facebook, Instagram and Pinterest.  I look forward to seeing you there.

Advertisement

Swiss meringue buttercream flowers

Back in February I was at Faircake for their Buttercream Flowers Cake class learning how to make piped flower decorations using swiss meringue buttercream.    The class, which is jam-packed with content, includes how to make a variety of large flowers, succulents, leaves and smaller filler flowers.

Swiss meringue buttercream is light, not too sweet, has a lovely velvety smooth texture and is so irresistibly delicious.  Although not difficult to make, this buttercream is tricky to work with as it melts easily and is certainly not recommended for hot summer days.

Here are some of the pretty flower designs that can be achieved.  All these were made using a Wilton 104 nozzle, centres were piped using a Wilton No. 2 nozzle and leaves with a Wilton 352 nozzle.  Enjoy!

First up, everyone’s favourite – a large rose

Swiss meringue buttercream rose

Swiss meringue buttercream rose

Next a pretty open rose

Swiss meringue buttercream open rose

Swiss meringue buttercream open rose

And finally spring-time cherry blossom.

Swiss meringue buttercream cherry blossom

Swiss meringue buttercream cherry blossom

A feast for the eyes and delicious too.

Russian flower nozzles

Last week I bought a set of these instant flower nozzles from Iced Jems.   A friend mentioned them to me  (thanks, Hot Chop Threads!) and as soon as I saw them, they jumped to the top of my ‘must -have-list’.

Russian piping tips

Russian flower nozzles

Often the nozzles are mentioned elsewhere as Russian flower nozzles (because they come from Moscow, apparently) and this set from Iced Jems is a selection of the many Russian flower nozzle designs available.   These seven nozzles provide a good selection and I am not sure that you would miss the others as they are really a variation on a theme.

The nozzles promise the ability to quickly pipe intricate buttercream flowers on your cupcakes.  Could it really be so easy?   Only one way to find out – bake some cakes, make some buttercream (I used American buttercream here) and get piping!

My set includes two rose bud nozzles  – this one and the other similar nozzle that produces finer petals.

Russian piping tip - rose bud

Russian flower nozzle – rose bud

The other five nozzles in the set produce variations of tulip flowers like these.  Don’t you love those little stamens?

Russian piping tip - tulip

Russian flower nozzle – tulip

So what did I think?

Well, I love the nozzles and they quickly turn any cupcake into a beautiful posy of flowers.    More creative effects are possible by adding piped leaves, using multiple colours of buttercream in the piping bag to give a striped effect, or using the rose bud nozzle as the starter for a larger rose.  Something for me to try on another day.

I did find the nozzles took a bit of practice to get the flowers to form properly without sections breaking or worse, not adhering to the cupcake at all, or looking more like a blob than a flower.

To get the flowers to stick to the cupcake, I found that it helped if I spread a little fresh buttercream on the cupcake just before piping so the flower had something to stick to.   And wiping the nozzle tip between each flower helped ensure each flower piped cleanly.   The consistency of the buttercream was absolutely critical to success.  It has to be fairly stiff to form the intricate flower.  Once the buttercream warmed up from the heat of hands, I found I piped blobs rather than flowers.  Easily fixed by popping the piping bag in the fridge for a minute or two to cool down.  Timing was important here as you can’t let the buttercream get too hard.

Now off to make more buttercream and give those other nozzles a try.

Chocolate rose cupcakes

Mmmm chocolate.  There is something about the smell of chocolate that is just so delicious.  Today, whilst it was pouring rain outside, I spent my time in a warm kitchen making chocolate cupcakes. What a life!
Chocolate and roses just seem to go together so I decorated  my cupcakes with glossy chocolate ganache (hint – always make extra to have with toast later – it is delicious!) and hand made fondant roses.  Usually I colour my own fondant however this time I used a ready coloured one from Renshaw called fuchsia pink.  Don’t you think the strong colour looks great against the dark chocolate? 
 
If you haven’t made ganache before you really should give it a try.  This is the recipe that I use and this amount should be enough to decorate 12 cupcakes.
 
100gm dark cooking chocolate
100ml of double cream
 
Break the chocolate into small pieces and put it in a heat proof bowl.
Heat the cream in a saucepan until small bubbles appear on the edges but don’t let it boil.
Pour the hot cream over the chocolate and let it stand for a couple of minutes.  
Stir the mixture until it is lovely and glossy.
Spread the ganache over your cupcakes using the back of spoon.
Any left over ganache can be stored in the fridge for your toast the next day.  Enjoy!